Learn Git … !! V 1.0
Hi! I’m will be your guide to learn Git.
To keep things simple we will use the command line to execute Git commands.
Git is a version-control system for tracking changes in source code during software development. It is designed for coordinating work among programmers.
Github brings together the world’s largest community of developers to discover, share, and build better software.
We will use Github as the platform to practice our learning.
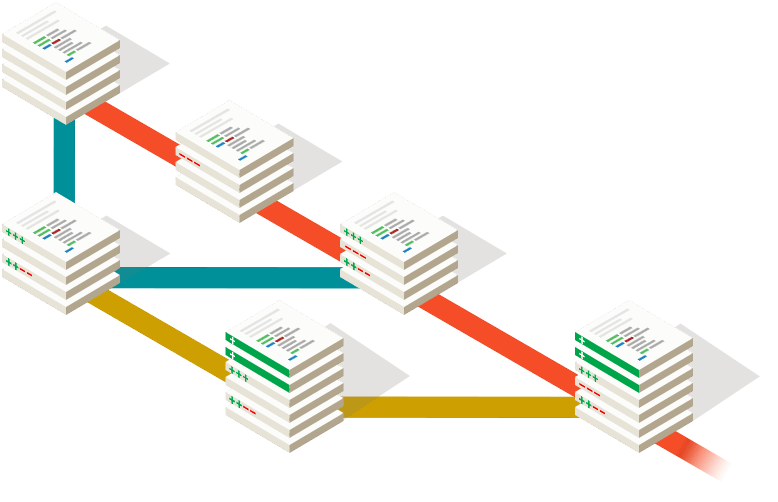
Let’s Begin by Creating a Local Repository (Execute the command in a Cell)
> Git init

Initialized empty Git repository in D:/git_training/.git/
The Exclamation Mark ensures that the command is executed as a Terminal Command. The Output shows that we have created a local Empty git repository.
We should be able to evaluate the status of the created repository using the “Status” command
> Git status
This would allow us to check the current status of our Repository at any point in time.
On branch master

No commits yet

nothing to commit (create/copy files and use "git add" to track)
Let’s add a New File to the Folder called “hello.txt” which has a sample text inside it.
Execute the following to see if Git has started tracking changes.
> Git Status
The Output should be something similar to this.
On branch master

No commits yet

Untracked files:
  (use "git add <file>..." to include in what will be committed)
        hello.txt

nothing added to commit but untracked files present (use "git add" to track)
This is very informational. Let us evaluate each of the messages before proceeding further.
| Message | Description |
|---|---|
| On branch master | We are currently working on master branch. |
| No commits yet | have not made any commits to the repository so far. |
| Untracked files | found some files which are listed below this message. This implies that Git was able to find some files which are part of the folder which Git is Tracking for changes. |
Git Branch - A branch in Git is simply a lightweight movable pointer to one of these commits. The default branch name in Git is master. As you initially make commits, you’re given a master branch that points to the last commit you made. Every time you commit, it moves forward automatically.
Git Commit - Commits are created with the git commit command to capture the state of a project at that point in time.
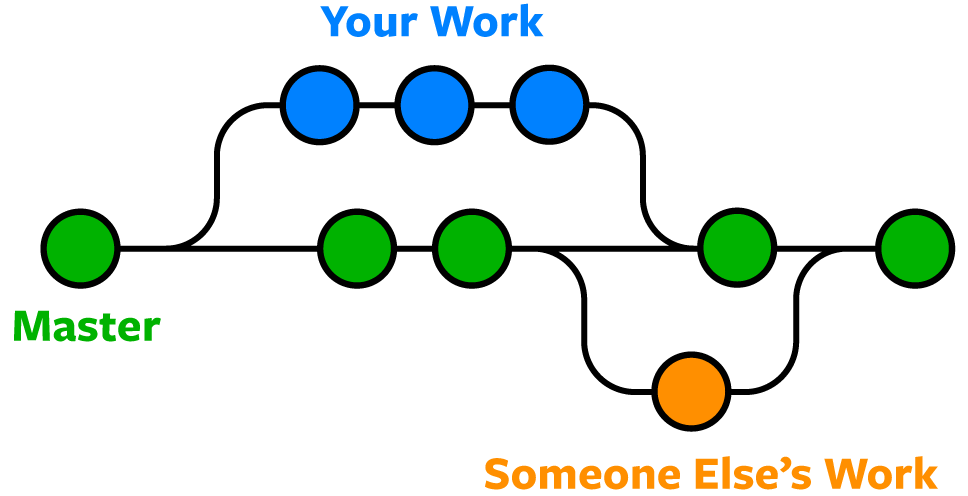
Effectively we are trying to achieve the following workflow:
We will now add the files that are currently untracked.
> Git add .
> Git status
We will be adding the un-tracked listed above in our repository. Notice the “dot” at the end. This is to select all the files. Alternatively, file names can be specified.
On branch master

No commits yet

Changes to be committed:
  (use "git rm --cached <file>..." to unstage)
        new file:   hello.txt
The status has not changed to No Commits which specifies that changes are yet to be committed to the branch master.
Before we start committing Git needs to know who we are in order to maintain a name and email ID along with the commits. Execute the following before making a commit. This is a One Time Activity.
> git config --global user.email "you@example.com"
> git config --global user.name "Your Name"
Now, let’s Commit
> Git commit -m "Initial Commit"
The hyphen m specifies the comment that should be added to commit. Consider it like a change log that a user can maintain.
[master (root-commit) 4bf0552] Initial Commit
 1 file changed, 2 insertions(+)
 create mode 100644 hello.txt
The following message confirms that 1 files was changed with 2 lines added into Git version system. Furthermore we can track Git Status which we have already learnt.
Branching
Branching is just a natural way to manage and maintain individual code in isolation and merge when ready to the master. This approach allows multiple people to work on same code base and realize the changes once everyone is ready. This is naturally collaborative.
Git Branch is a command to allow to work with branches.
> Git branch --create dev
This creates a new branch called dev. This is just a name and can be anything. Usually branch names are tied to environments or feature or people depending on the Team’s agreement. We can easily see the branches we have.
> Git branch --list

  dev
* master
  qa
I have crated two branches dev & qa apart from master. The * denotes the current branch under selection/operation.
Let’s do a Checkout
The git checkout command lets you navigate between the branches created by git branch . Checking out a branch updates the files in the working directory to match the version stored in that branch, and it tells Git to record all new commits on that branch.
> git checkout dev
Switched to branch 'dev'
We can validate anytime the working branch using the Status command.
> Git Status
On branch dev
nothing to commit, working tree clean
Let’s make an edit to the file and check the status again.
On branch dev
Changes not staged for commit:
  (use "git add <file>..." to update what will be committed)
  (use "git restore <file>..." to discard changes in working directory)
        modified:   hello.txt

no changes added to commit (use "git add" and/or "git commit -a")
While this specifies that change was made to the file and it is not committed, It is difficult to understand the exact changes that were made.
Git Diff to the rescue.
git diff is a multi-use Git command that when executed runs a diff function on Git data sources. These data sources can be commits, branches, files and more. … The git diff command is often used along with git status and git log to analyze the current state of a Git repo.
Before we see that we should ensure that we have performed the following operations to the current branch.
- Git Add - To ensure the changes are added to the current branch.
- Git Commit - To Ensure that changes are saved to the current branch.
We can execute the diff command now.
> git diff dev..master

diff --git a/hello.txt b/hello.txt
index 21f10ab..3e23ae4 100644
--- a/hello.txt
+++ b/hello.txt
@@ -1,2 +1,2 @@
-hello there.
-How are you Doing ?
+
+hello
This describes every addition and deletion operation with the modified record.
To Summarize our actions so far. We have achieved the following :
- Created an Empty Git Repository and added a file to it to track.
- Created different branches
- On Branch dev we have edited and saved the information that was changed.
- The changes were evaluated using Git Diff command.
Our Master is still behind by an update compared to dev branch. A handy command to use is Git Log
The Git Log tool allows you to view information about previous commits that have occurred in a project. The simplest version of the log command shows the commits that lead up to the state of the currently checked out branch. These commits are shown in reverse chronological order (the most recent commits first).
Let’s fire it up.
> git log

commit 2b1ab39870ed9eb38c47a34c6dd08cb5b4a92c09 (HEAD -> dev)
Author: Akarsh <akarsh.verma@live.in>
Date:   Sun Jun 14 01:34:49 2020 +0530

    Update

commit 4bf055215f054e1e553bd9aa727cee237bd3eaff (qa, master)
Author: Akarsh <akarsh.verma@live.in>
Date:   Sun Jun 14 01:07:43 2020 +0530

    Initial Commit
The Git Log provides quite a lot of information. It tells the user about the status of each branch along with the last commit messages which are timestamped to understand and select the right change.
These set of commands are extremely handy when working on Git and formulate the foundations of a Version Control System.
Merging
Merging is an idea where we take our independent feature/change and align it with the larger Code Life-cycle. This is foundational to Git as it ensure that though people operate in isolation the most updated version is always available for ready usage.
Introducing, Git Merge
The git merge command lets you take the independent lines of development created by git branch and integrate them into a single branch. … Again, this means that git merge is often used in conjunction with git checkout for selecting the current branch and git branch -d for deleting the obsolete target branch.
Let us start by switching to Master branch first.
> git checkout master
Switched to branch 'master'
The Status should specify that master has no changes.
> git status
On branch master
nothing to commit, working tree clean
Let’s run the Git Merge
git merge dev

Updating 4bf0552..2b1ab39
Fast-forward
 hello.txt | 4 ++--
 1 file changed, 2 insertions(+), 2 deletions(-)
We have merged Dev Branch into Master. We can validate this the Git Log command
> git log
commit 2b1ab39870ed9eb38c47a34c6dd08cb5b4a92c09 (HEAD -> master, dev)
Author: Akarsh <akarsh.verma@live.in>
Date:   Sun Jun 14 01:34:49 2020 +0530

    Update

commit 4bf055215f054e1e553bd9aa727cee237bd3eaff (qa)
Author: Akarsh <akarsh.verma@live.in>
Date:   Sun Jun 14 01:07:43 2020 +0530

    Initial Commit
The HEAD in the Git repo is pointing to master and dev both of which has the latest update. We can now delete the branch dev and continue our development for another feature.
Git Head. The HEAD points out the last commit in the current checkout branch. It is like a pointer to any reference. The HEAD can be understood as the “current branch.” When you switch branches with ‘checkout,’ the HEAD is transferred to the new branch.